
Hi friends!
Welcome to the first post in my May Brand Spotlight on Clinique! If you have no idea what that is, make sure you check out last week’s introductory post which is linked directly below. I’ll be talking about a lot of Clinique this month here on the blog, and I’m starting today with a more technique-based post for you all. How I learned to use cream contour!
Read this: Introducing May’s Brand Spotlight on Clinique
I recently picked up the Chubby Contour Stick last month (or the Chubby Stick Sculpting Contour as it’s officially known), and I’ve been trialing it ever since. I should preface this by saying, I don’t know much at all about true contouring. It’s very intimidating for a few reasons: 1) it involves knowing and understanding your face shape, 2) it involves understanding tones and undertones, and 3) if you do it wrong it will look very obvious!
So if you’re expecting a “contouring 101” kinda post, this isn’t it! What I will tell you in this post is how I learned to use the Clinique Chubby Contour Stick in a way that works for my (limited) skill-set, focusing specifically on how I found the perfect way to apply and blend a cream-textured contour. I know creams are something that many people struggle with, so I hope this is helpful.
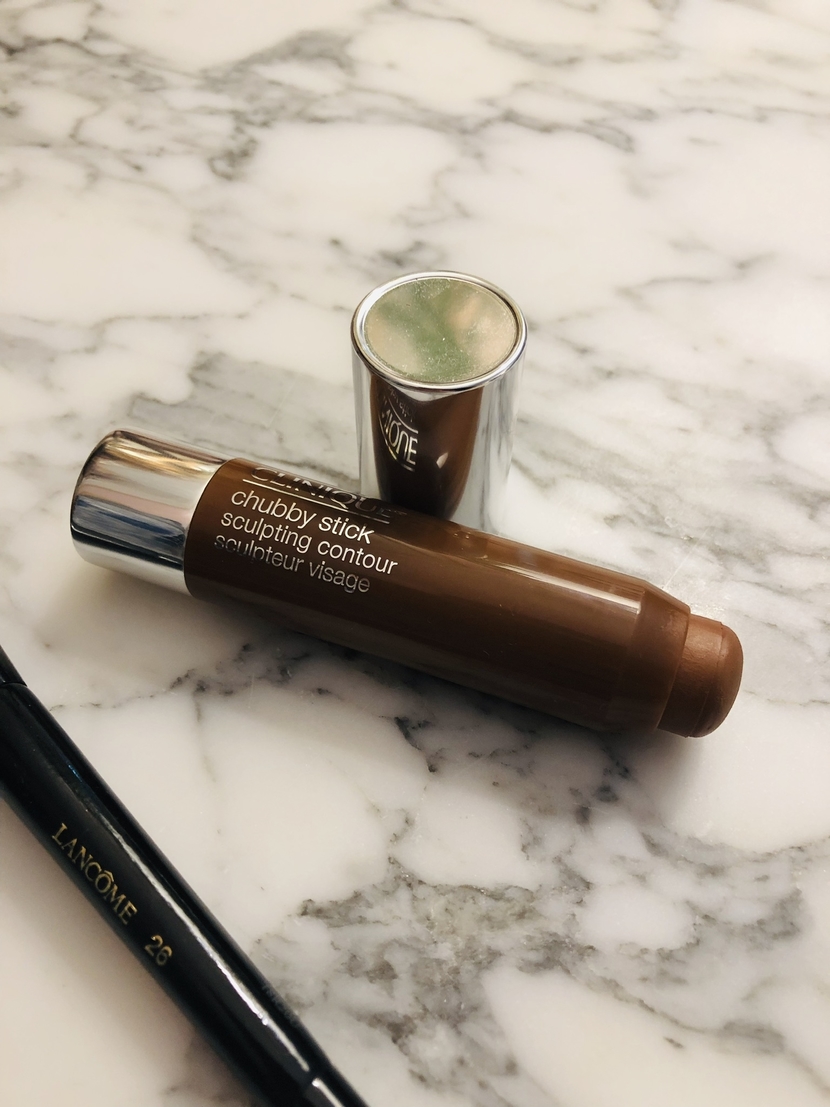
CLINIQUE CHUBBY CONTOUR STICK – LET’S TALK TEXTURE AND COLOR
As the name would suggest, this is a stick product which makes for an incredibly easy application. You can literally draw the product onto your face and control exactly where you want the placement of color. It’s also very easy to blend out across the skin, particularly if you don’t apply any powders before you apply this (creams generally perform better when applied over other creamy surfaces). I didn’t notice any harsh lines or obvious patchiness when I used this product, so in my opinion this is a very user-friendly contour product that’s great for beginners.
In terms of the color, that’s where I run into some qualms. It only comes in one shade, Curvy Contour, which is disappointing. There’s no way one color is going to work for every skin tone, so I’m not sure what Clinique is thinking here. For my pale, cool-toned complexion this shade is quite warm and works better to liven up my complexion, rather than creating natural-looking shadows on my face. (Keep in mind, more “traditional” contouring products are usually cooler and grayer in tone.) I personally have to be careful not to go overboard with this. I build up really slowly and blend really well to make it appear more seamless against my skin tone.
A quick note on longevity: I wouldn’t say this is the longest-lasting product. Since it is quite creamy, I’d say you’ll probably get no more than 6-8 hours of decent wear with this. But keep in mind your skin type will also play a big role in that.
Read this: Want quick & easy makeup? Grab a stick!

HOW I LEARNED TO USE CREAM CONTOUR – LET’S TALK TRIAL AND ERROR
Traditionally you’d place contour along the bottom of your cheekbones, from the ear to the middle of your eye in order to throw a shadow there. I’m still not skilled at that so I use this a bit differently. I like to apply this product high up on my cheeks, nearly along the tops of my cheekbones, to give my face a bit of shape. I have a very round face shape so I need all the help I can get from cosmetics!
I went through a few different methods to try and get the best application and blend with this product, which I’ll take you through now.
- Method #1 – I picked up the product from the stick with my middle finger and then gently tapped it into my skin. This is my general go-to technique for applying cream blush. This looked OK, but not great. I knew the blend could be a whole lot better, so I tried again.
- Method #2 – I gently drew the product along my cheeks like a big ‘ole crayon, and then blended it in with my new Lancome #26 brush (more on this in a bit). The finish was better than I got with Method #1 for sure, but I still wasn’t completely happy with it. Back to the drawing board!

- Method #3 – I drew the product onto the back of my hand first (like in the photos above). I then picked up small amounts at a time with my duo-fiber brush, and ever so gently started to blend in small circular motions across my cheeks. Perfection I tell you! The combination of small layers of product and the duo-fibers in the Lancome brush lay down the color so seamlessly on the skin. Usually I always defer to the warmth of my fingers to press and blend products here, but in this instance a brush is really key to a flawless look.
A QUICK WORD ON THE LANCOME DUAL-ENDED FOUNDATION AND CORRECTOR BRUSH #26
This is also a new purchase, which I snagged after I got my makeup done by a Lancome artist last month. She used this #26 brush for my foundation and I just knew I had to have it. I’ve been intrigued by duo-fiber brushes for a while now, ever since I heard how flawlessly they apply base products and other cream textures. I’ve used this a few different ways since I bought it, but so far I love it the best when used with this contour product. I also adore it with cream blush (I may do a whole separate post on that actually).
It’s dual-ended but I find I only gravitate to the larger end. (The smaller end is honestly a bit scratchy for my liking.) When you just skim it along your face or cheeks, amazing things happen I tell you! Whether the product is foundation, tinted moisturizer, cream blush or contour, this brush just airbrushes color onto you. Totally gorgeous! I’m a convert for sure.

So I hope you guys liked this post about how I learned to use cream contour! I hope it was helpful to anyone out there who struggles with that. Let me know in the comments if you have any questions or tips of your own to share. I’d love to hear them!
xo, Erica
PIN IT!


The third method sounds so much easier!! 🙂 I like that color, by the way.
Yea, I can’t believe it took three tries to figure it out! 😆
I have no idea how to contour either but these were some great tips on how to use any kind of cream product! Thank you, Erica. That brush sounds amazing, too.
You’re so welcome! Happy to help! ❤️